"; */ ?>

rails


22
Jul 11

Having Cluster Fun @ Chariot Solutions

The best way to experiment with distributed computing is to have a distributed cluster of things to play with. One approach would of course be to spin off multiple Amazon EC2 instances, which would be wise and pretty cheap:

Micro instances provide 613 MB of memory and support 32-bit and 64-bit platforms on both Linux and Windows. Micro instance pricing for On-Demand instances starts at $0.02 per hour for Linux and $0.03 per hour for Windows”

However some problems are better solved/simulated by having real, “touchable” hardware, that would have real dedicated disks, dedicated cores, RAM, and would only share any kind of state with other nodes over network. Easier said that done though.. Do you have a dozen of spare (same spec’ed) PCs laying around?

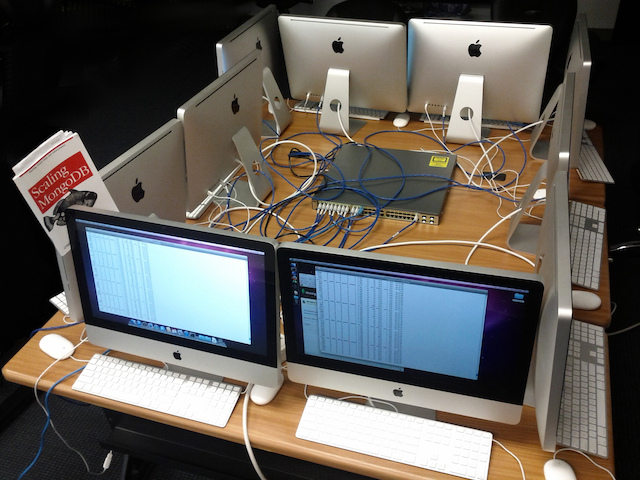
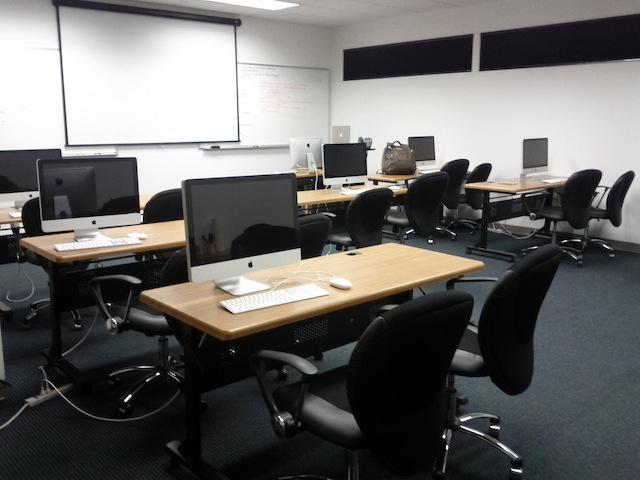
But what if you had an awesome training room with, let’s say, 10 iMacs? That would look something like:

Chariot Solutions Training Room

This is in fact the real deal => “Chariot Solutions Training Room“, which is usually occupied by people learning about Scala, Clojure, Hadoop, Spring, Hibernate, Maven, Rails, etc..

So once upon a time, in after training hours, we decided to run some distributed simulations. As we were passing by the training room, we had a thought: “It’s Friday night, and as any other creatures, these beautiful machines would definitely like to hang out together”…

Cluster at Chariot Solutions

This is one of this night’s highlights: a MongoDB playground. The same Friday night we played with Riak, Cassandra, RabbitMQ and vanilla distributed Erlang. As you can imagine iMacs had a lot of fun in a process pumping data in and out via 10 Gigabit switch. And we geeked out like real men!


1
Feb 09

Deploy Rails Application on Bluehost

Rails on Bluehost
Deploying Rails application on Bluehost for the first time can be quite frustrating. Bluehost provides 24/7 support via phone, ticketing system and live chat, which could seem appealing at first. However people with knowledge of Rails (and quite frankly simple networking/hosting) is a pretty rare find at Bluehost.

Forget phone and live chat support when it comes to Rails – it is not there – period. Ticketing support has a “24 hour come back” policy and most of the time the answer would be “read documentation in bluehost knowledge database”. And it would be ok (not good, but still ok) if bluehost knowledge database had any useful information – it does not.

The problem being is that bluehost, as any other hosting company, has its own proprietary configuration, and it is fine, but without the supporting documentation, bluehost is just an unusable black box. Hence friendly hacking is the only way to go to open it.

Choosing a Rails host today, I would definitely give a try to hostingrails, site5 or asmallorange, but some of my clients are with Bluehost, and since I like solving problems, here is a solution on how to deploy your Rails application to Bluehost.

Firstly, you would need to have an “SSH/Shell Access” enabled on your bluehost account. This requires you to show your “government issued photo id” (driver license / passport / state id / etc..) to Bluehost support. You can do it either through the ticketing system (upload along with the ticket), or while on the phone, you can upload it to one of your directories (e.g “tmp”) via cPanel, so they can look at it immediately, and activate your SSH access.

Once the access is granted/activated, you can ssh to your domain through cPanel Java Applet:

 Security -> 'SSH/Shell Access' -> 'Connect using SSHTerm (requires Java)'

However the applet will only work on Windows box (at least not via Ubuntu / Mac). Therefore it is much easier to just ssh to your domain from a command line:

user@host:$ ssh yourusername@youdomain.com

‘username’ can be found on the left hand side of the main cPanel view. Password is the same as for your bluehost account.

Now it is time to get to work, and deploy your Rails application.

Before hitting the terminal and work via command line, there are two more things that need to be done via cPanel:

1. Upload your application to the bluehost box. From cPanel main view:

 Files -> 'Unlimited FTP' -> 'UnlimitedFTP' button

That loads a simple FTP Java app inside your browser (this one works on Mac / Ubuntu :) ) with a regular left/right pannel, where you can select you Rails application on your local box (panel on the left), and drag and drop it in a directiry (e.g. “tmp”) to the bluehost box (panel on the right).

2. Create a subdomain by going to cPanel main view:

 Domains -> 'Subdomains', enter "dumbapp" (no quotes) to Subdomain' field, and click 'Create' button

There is no real need to create this subdomain (unless you really need a subdomain), but it will come handy later on for testing, and such.

Now let’s hit that command line… SSH to your box (ssh bluehostusername@yourdomain.com)

3. Go to your home directory (just in case), and create a “dumbapp” rails application:

cd ~
mkdir rails
 
cd rails
rails dumpapp

4. Now you are in “~/rails” directory, copy YOUR real application to it:

cp -r path-where-your-rails-app-is-uploaded/your-rails-app-name .

5. Copy dispatch.* files from the “dumbapp” to YOUR real application:

cp dumpapp/public/dispatch* your-rails-app-name/public

6. Goto “~/public_html”, and create a symbolic link to YOUR application’s public directory

cd ~/public_html
 
ln -s ~/rails/your-rails-app-name/public dumbapp

access your Rails application at: “http://dumbapp.yourdomain.com”

6. You, of course, can change the symlink and subdomain names in case you all you need is a subdomained Rails app, however most of the time it is not the case, and most of the time you would want your Rails application to be accessible from a top-level domain: “http://www.yourdomain.com” (no subdomain)

All you need to do for that is to back up your “~/public_html” directory (just in case), and create a “~/public_html” symbolic link:

cd ~
mv public_html public_html_backup
rm -rf public_html/
 
# creating a symbolic link to YOUR application from "~" directory
ln -s ~/rails/your-rails-app-name/public public_html

You may want to have your “map.root” from (config/routes.rb) to be uncommented and pointed to the main controller (but that is already a pure Rails talk :) )

Now get in the blue train and hit the Rails!
Good Luck!

NOTE:
run “rails -v”
make sure you have the same Rails version in “~/rails/your-rails-app-name/config/environment.rb”.

If the version is not the same, update your ‘RAILS_GEM_VERSION’ setting in “config/environment.rb” for the Rails version Bluehost has installed, or comment out ‘RAILS_GEM_VERSION’ to use the latest version installed.

e.g.

vi ~/rails/your-rails-app-name/config/environment.rb
 
# Specifies gem version of Rails to use when vendor/rails is not present
#RAILS_GEM_VERSION = '2.1.0' unless defined? RAILS_GEM_VERSION
RAILS_GEM_VERSION = '2.2.2' unless defined? RAILS_GEM_VERSION

in case your application is built on 2.1.0, and bluehost has 2.2.2 installed (“rails -v” should give the current Rails version installed)


19
Nov 08

ZX-Spectrum Child

zx speccy logoMy first computer book was “Basic for Children with Arturo”. It was 1989, the book was in Russian, and I was 10…

Back then, in USSR, to own a 8086 compatible PC was somewhat mystical, and therefore people, who knew a thing or two about microelectronics, were putting together Speccy(s) (ZX Spectrums), which were based on Zilog Z80 8-bit microprocessor and ran at 3.5 MHz.

The official ZX-Spectrum that was sold by “Sinclair Research Ltd” at that time was a bit pricey for middle class families, and therefore many cities across Europe and USSR started to come up with their own “clones“. There were over 50(!) semi-official clones that came out by the end of 1980s, beginning of 1990s. But to cut cost even further, people who knew “how to solder” created hybrids of the clones at home, which came out to be very cheap.

The process to build ZX-Spectrum’s clone’s hybrid was “a bit” involved, and included many days/weeks of hacking poor, incomplete electrical circuit documentation and sleepless nights of manual calibration of the hardware. The one had to “get” a ZX-Spectrum full circuit schema:
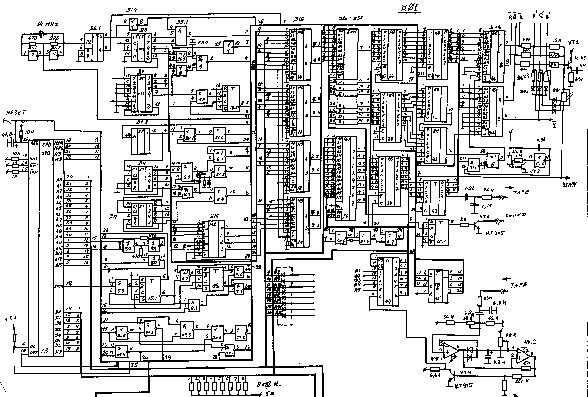
zx spectrum electrical circuit

Study it, change it to fit the budget. Go to several flea markets to first find a CPU, which was a quite rare find:
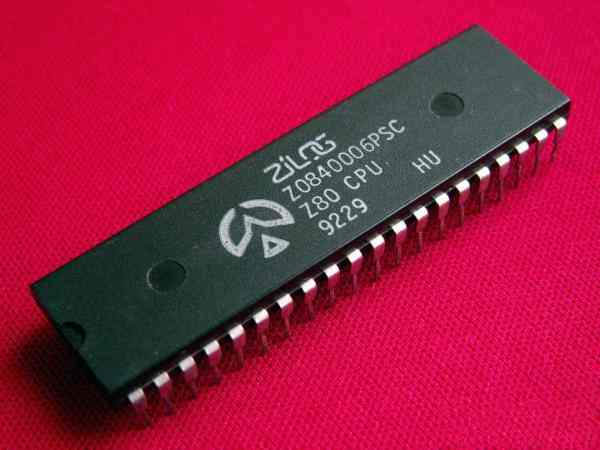
zilog z80 cpu

plus many more components: an empty electrical board, all other chip, transistors, capacitors, resistors, etc…

After some time and a combination of new ideas, documentation, hardware and labour, the one ended up with something like this:
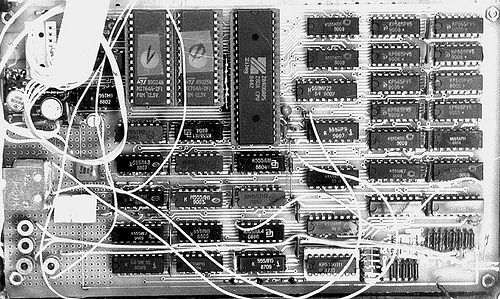
zx-spectrum circut board

ZX-Spectrum keyboard had an interesting feature – pretty much every key, depending on the combination of special keys used, could represent 3-4, sometimes even 5 different things (commands/letters/symbols/special characters/etc). This made it much smaller (“compacter”) than for example PC keyboards:
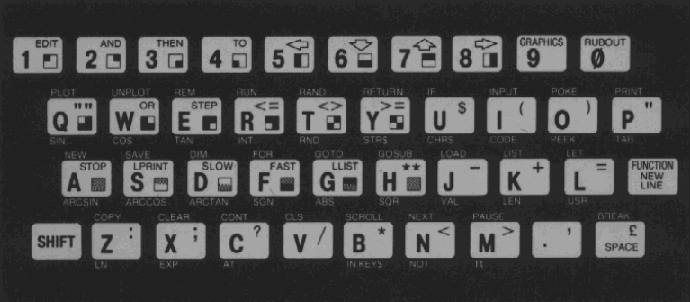
zx-spectrum keyboard

And due to its small size, it most of the time served as a ZX-Spectrum case, and fit it the Speccy’s “motherboard”:
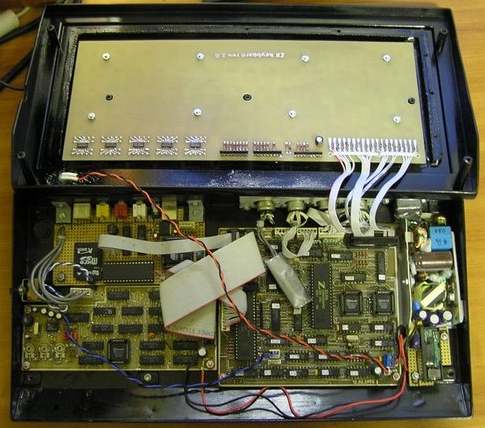
zx-spectrum under the keyboard

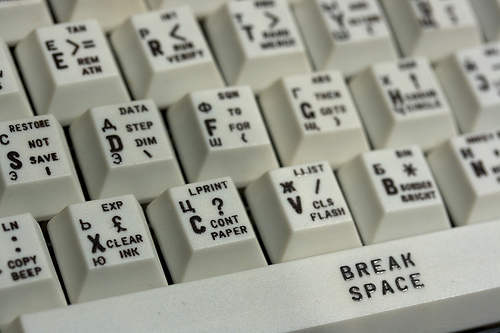
There were also some alternatives, and some people used “an extended” keyboards, but “a single key multi-purpose” pattern was still there. Here is a snippet of the Russian ZX-Spectrum keyboard, for example:
zx-spectrum russian keyboard

which is “a bit extended” – has a separate cursor, and some other keys. But take a look at the individual keys – due to the additional Cyrillic letters, “an average key” is now used to represent even more (+1) values.

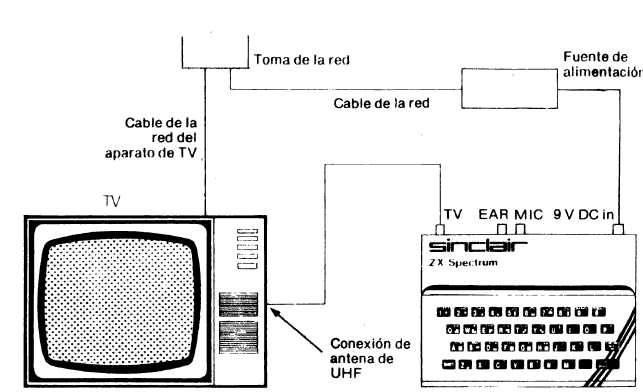
At this point, when most of the work with oscillograph was behind, the only true way to see if the creation works was to see it with your own eyes. The word “monitor” in a sense of a “computer monitor” was not a widely used due to its price mostly, therefore most of ZX-Spectrum people used old black and white (at first) TVs. Speccy (well it’s clone’s hybrid at least) was designed in a way that it could be pugged into a regular TV Antena’s jack:
zx-spectrum hookup to TV

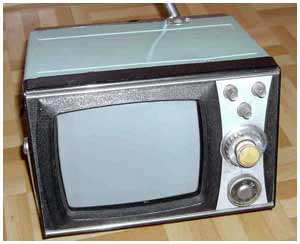
And due to the fact that family is usually more than one person, the main TV often was not used, and people used old TVs as a Speccy “monitor” instead:
zx-spectrum TV monitor

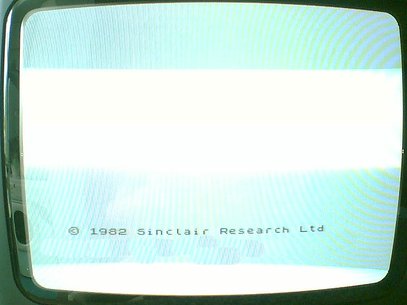
The whole process above was about 50% of the job – yea, just 50%. The other half was split on two. First quarter was spent in calibrating hundreds of little circuits, in order to get a sacred “© 1982 Sinclair Research Ltd” message at the bottom of TV (monitor):
1982 Sinclair Research Ltd

This message brought lots and lots of joy into families once it appeared on the screen. It meant a lot – CPU was working (so that guy on the flea market who sold it to you was ok.. sigh…). ROM was working (so that guy on the flea mark…). CPU and ROM were calibrated to work together, along with RAM and some other parts.

Usually the one plugged in Speccy to TV with no RAM/ROM/CPU at first, and calibrated all the circuits to reach a documented pattern on TV (for example small squares). After that was achieved, RAM/ROM and CPU were inserted one after the other by the same technique – each had to produce a certain visual pattern. So if all the parts were inserted and the message “© 1982 Sinclair Research Ltd” appeared, job was 75% done.

The last quarter was usually spent to tune all the parts to work as designed. Most of the time Speccy would restart in 3-4 minutes of use, just because something was “out of it”. To find that “something” was an art on its own. There was no Internet, no books or literature on this – it was pure work of art!

Fortunately my father is such an artist, and by the time I was 10, I got one of those Speccy beasts that my dad and I put together. The only problem though was that although it was designed to have 64Kb of RAM, it only had 16Kb. Well, 7 months later we solder more capacitors around 4Kb RAM memory chips, and that fixed it, but for 7 months I could not really play any games, because most of them required 64Kb to be there. Hence, the “Basic for Children with Arturo” book did not get a chance to get too dusty…

Where ZX-Spectrum shined the most is of course boot time – there was none :) Well, everything was in a ROM chip, including Sinclair Basic.

So having spent about 4-5 months to build Speccy, I was out of luck, and could not use it. Well, that is how I saw it for the first one or two weeks. But then…. I pressed a “p” key, which by default was a Basic “print” command, and then…. I typed what was on my mind: “I want to play!”, and to my astonishment Speccy “said“: “I want to play!”.

It is probably hard to surprise anybody right now by the fact that computer prints something on the screen, when you ask him/her to, but for me, being 10, and haven’t seen anything cooler than that, it was the biggest technical discovery of all times. I picked up my Basic book, and started to type, and type, and type, and then…. type a little more. That is how I started. That, in programming sense, makes me a “Speccy Child”.

A program in Basic in Speccy looked something like this:
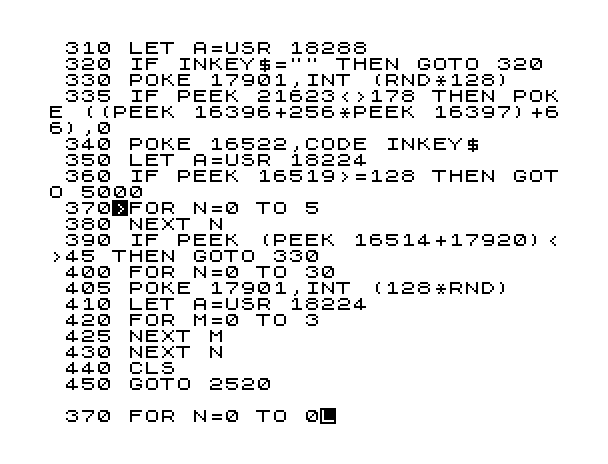
zx-spectrum Sinclair Basic

where every line had to have a number, and the usual increment was 10. Quickly my favourite commands became “peek”, “poke” and “randomize” which worked directly with the memory (absolute addresses). And although I felt like a memory King, something was missing. I figured out what it was after I bought a system program that exposed me to something much more powerful than Basic – it was 8-bit Assembly language, the language that Zilog Z80 talked natively. Therefore me together with Z80, could control pretty much everything in the Speccy kingdom. That was awesome!

Here is an example on how you’d print a line of text to the screen in Speccy’s native language:
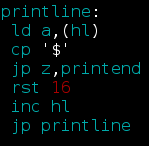
zx-spectrum z80 assembly

Cool – huh!? Another thing that was very useful at the beginning of my Assembly journey, was a documented character table ( like an “ASCII” ):
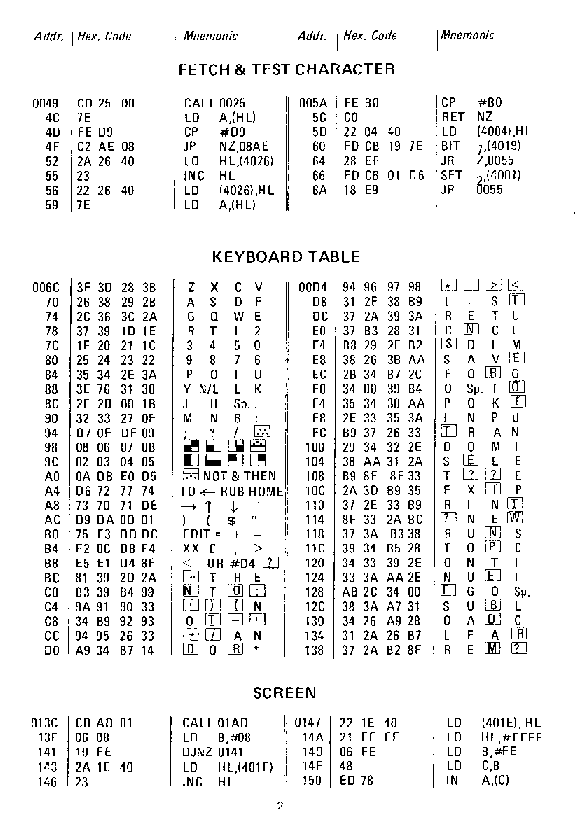
zx-spectrum ascii table

The only problem was that in order to work in Assembly, or in any other language, or with any other system program – it needed to be loaded since it was not in RAM/ROM – and that took time. No, really took time. It needed to be loaded from a tape – a regular cassette that is used in a tape recorder. In fact these very tape recorders were used to load all these neat programs in:
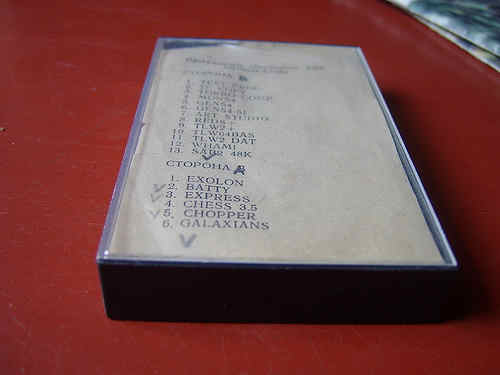
zx-spectrum tape

But not only it did take time to load, it was a constant pain to tune the head of the tape recorder for each tape bought on the flea market, since nobody followed the recording standards. A lot of times, you would have to sit and hold a screwdriver against the recorder’s head for 3-5, even 10 minutes, depending on how big the program was.

Here is what the screen looked like when the program was loading from tape into RAM. You can see the zebra looking lines, they were the moving loading indicator:

zx-spectrum loading screen

But time went, flea markets grew along with demand, and we upgraded to the real “RGB deal”. It was done by soldering an external controller (kind of like modern video cards, but not really) that had an RGB jack:

zx-spectrum rgb jack

Although it had 9 pins, only 5 were used: Red / Green / Blue / Sync / Ground. But we did not stop on this. Soldered another external controller, but this time for a disk drive! Oh yea – that was a huuuge deal. Looking at programs to load for seconds (well in rear occasions minutes) from these beautiful 5 inch disks!

Since we had a disk drive, Speccy needed to catch up with us, and the disk controller brought another cool thing, which was TR-DOS, where, of course, DOS stands for Disk Operating System. That is how pretty it looked:
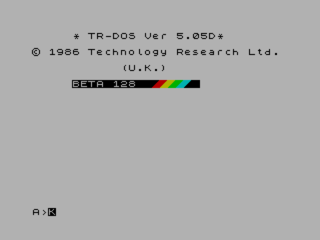
zx-spectrum tr-dos os

Did you notice some colour? Good catch :) So now it was possible to actually browse the disk, and start programs with a button click. There were tons of system utilities with different browsers that you could start at the start up time (sort of like in MBS, but not).

Right after TR-DOS, I felt like I need more. I need more.. I need more.. RAM! And we soldered another level of RAM on top of 64Kb chips. So now my Speccy was equipped with 128Kb of RAM, which could free up some ROM real estate, which enabled ROM to fit a little menu on startup:
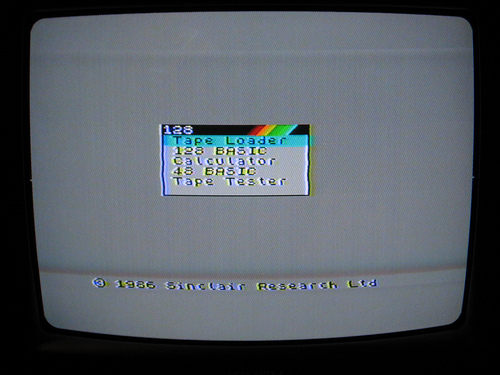
zx-spectrum 128 menu

At this point not only I could swim in the Assembly language ocean, but also play games, and use various utilities!

First let’s look at Photoshop:
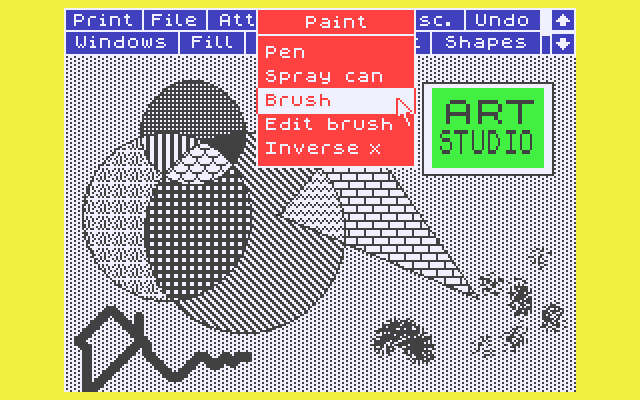
zx-spectrum artstudio

well, maybe not the Photoshop you’re used to see right now, but Art Studio rocked! I was drawing away for hours!

Now, how about CuBase/ProTools:
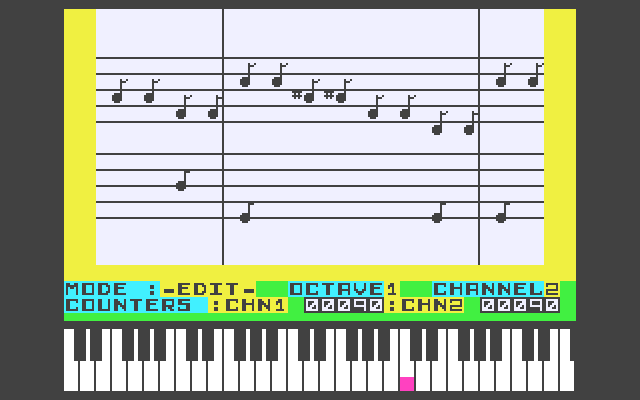
zx-spectrum wham the music box

well, maybe not exactly the latest CuBase, but I wrote lots of tunes in Wham. Some tunes I actually recorded along with playing a real guitar – it was cool!

As to games, my favourite control was my keyboard, but for many friends that came to play, I bought a joystick:

zx-spectrum joystick

Now we could play multiplayer games like:
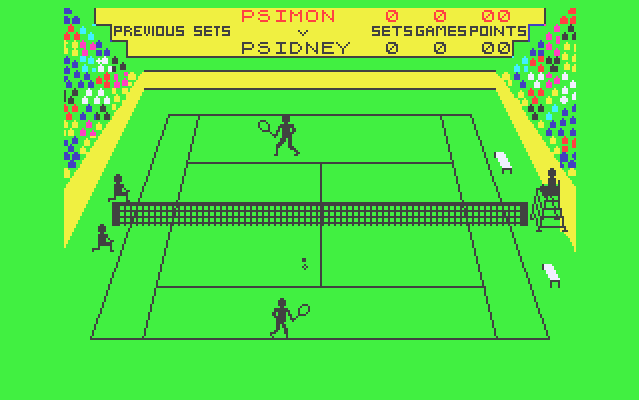
zx-spectrum match point game

Match Point (Tennis) or:

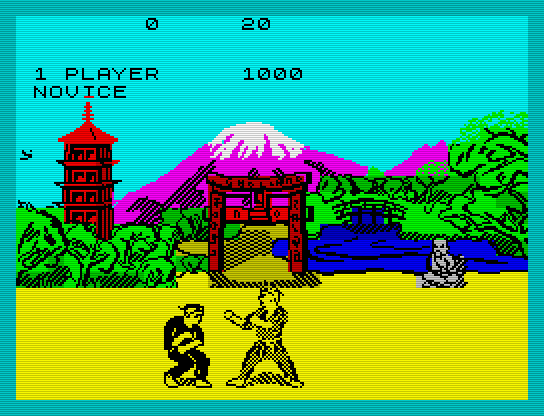
zx-spectrum fist game

Fist (Karate) game. Or even:

zx-spectrum tetris2 game

Tetris2 – which was a bit different from the regular Tetris in a way it gave different patterns and challenges on different levels, and was also a multiplayer game, which was of course cool.

There were tons of other games, but two I still remember are Robocop:
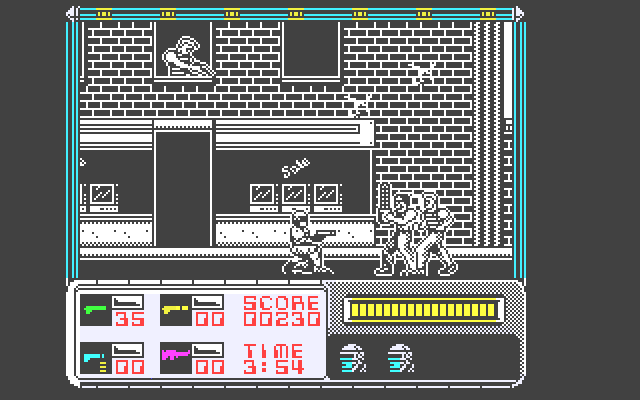
zx-spectrum robocop game

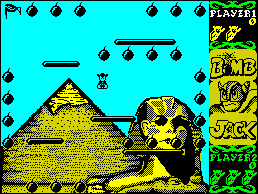
and Bomb Jack:

zx-spectrum bomb jack game

I could play long long time in Bomb Jack, not longer than I spent writing my own little games in Assembly language of course, but still – it was good amount of Bomb Jack time.

All the above was of course some time ago… 25, or even soon 30 years. Everything is a bit different now. Speccy lives somewhere in museum behind the glass:
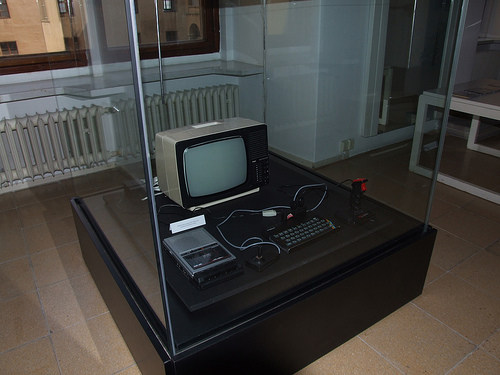
zx-spectrum in museum behind the glass

But I remember him/her – those were times of big discoveries for me!

Like probably right now for some other 10 year old kid who just accidentally pressed a “p” button, and discovered….. time traveling…

Good luck to you kid!

14
Sep 08

Configure Rails and MySQL to Support UTF-8

Rails on MySql

The fact that there are so many different countries, people and languages makes it very interesting to watch all them to use a single tool. Besides the different cultures of programming, there is a definite difference in languages that the tool needs to support in order to become widely used.

Luckily, if the tool is written to support UTF-8 encoding it is guaranteed to support all the modern spoken languages. Since UTF-8 is able to represent any character in the Unicode standard, yet the initial encoding of byte codes and character assignments for UTF-8 is backwards compatible with ASCII, and for these reasons, it is steadily becoming the preferred encoding for e-mail, web pages, and other places where characters are stored or streamed – in our case it is a mySql database.

When working with Rails on mySql, it is most of the time, a good practice to make sure the UTF-8 support is enabled, since even if there is no immediate need, in the future, clients of the Rails application could come from different points of Earth – due to the Earthy nature of the Internet.

Here are 3 simple steps on how to configure a Rails application and mySql database to support UTF-8 encoding:

Step 1. From the Rails side, due to the “convention over configuration” principle, there is only one thing to make sure of. Open the Rails database configuration file:

  vi config/database.yml

(here I used “vi” text editor, but any editor of choice can be used: notepad/textmate/emacs/aptana.. etc)

Notice the “encoding” option, and make sure it is set to “utf-8”:

  ...
        development:
        adapter: mysql
>>>  encoding: utf8
        database: my_international_db
        username: user
        password: password
        socket: /var/run/mysqld/mysqld.sock
  ...

That will conclude this step, since everything from Rails side is configured. Simple? Well, yes – Rails is well designed to keep it simple stupid.

Above is the sample for the Rails development environment, make sure that testing and production environments have the same configuration.

Step 2. Now it is time to configure MySql server. This will be done by editing “my.cnf” – mySQL configuration file:

  vi /etc/mysql/my.cnf

There are several sections in the file. Modify two of them – “client” and “mysqld” as shown below to configure mySql for UTF-8 support:

...
[client]
 
default-character-set=utf8
 
...
[mysqld]
 
default-character-set=utf8
character-set-server=utf8
default-collation=utf8_unicode_ci
...

Step 3. The very last action would be to restart MySql server. Here is an example on how to do it in Linux (Ubuntu):

  sudo /etc/init.d/mysql restart

NOTE: Only databases that are created after the above change will support UTF-8 encoding.

After these three steps Rails application and MySql server are configured, and ready to serve the whole planet!


2
Aug 08

Make rails.vim Work: Compile VIM From Sources

rails.vimEver heard about rails.vim project? “Accept no imitations: rails.vim is the one true Vim plugin for syntax highlighing, easy navigation, and script invocation for all your Ruby on Rails applications, transparently and unobtrusively” says creator Tim Pope.

The very good “rails.vim” guide can be found here or just by reading project’s vimdoc here.

PROBLEM:

There is however one gotcha for Ubuntu Hardy Heron lovers (or other modern Linux distros). Using rails.vim would result in VIM “segmentation fault”crashes similar to:

Vim: Caught deadly signal ABRT
Vim: Finished.
Aborted

REASON:

This is due to the fact that a packaged VIM that comes from some Linux distros repositories has old patches.

SOLUTION:

One of possible solutions would be to download most current VIM sources from http://www.vim.org/sources.php and compile/install it manually. Below is how it is done on Ubuntu (but should be pretty similar on any Linux distro):

1. Get vim sources:

wget ftp://ftp.vim.org/pub/vim/unix/vim-7.1.tar.bz2

(where ‘7.1’ is the current VIM version at the moment of writing)

2. Unpack it

tar -xvjf vim-7.1.tar.bz2

3. Install terminal libraries (vim needs them to compile correctly)

sudo apt-get install libncurses5-dev

4. Configure / Compile / Install

./configure --with-features=huge
make
sudo make install

5. Point your system to newly compiled VIM:

sudo rm /etc/alternatives/vi
sudo rm /etc/alternatives/vim
sudo rm /etc/alternatives/vimdiff
 
sudo ln -s /usr/local/bin/vim /etc/alternatives/vi
sudo ln -s /usr/local/bin/vim /etc/alternatives/vim
sudo ln -s /usr/local/bin/vimdiff /etc/alternatives/vimdiff

DONE